10 Tips to Install Solar Energy at Home?

Time:2026-10-15 Author:Henry
0%

Installing solar energy at home can reduce electricity costs, improve energy independence, and lower household emissions. Yet a successful system begins before anyone places panels on the roof. Roof age, sunlight, local weather, electrical capacity, utility rules, and future power needs all deserve careful attention.

Elon Musk, a technology and clean-energy entrepreneur involved with Tesla and SolarCity, once said, “Solar power is the largest energy resource on Earth.” His observation highlights solar energy’s enormous potential, but potential alone does not guarantee a good installation. A shaded roof can weaken production. An undersized inverter can limit performance. A battery may also cost more than a household truly needs.

These 10 tips to Install Solar Energy at home focus on practical decisions. They cover energy-use calculations, roof inspections, panel placement, equipment quality, installer credentials, permits, warranties, financing, battery storage, and system monitoring. Homeowners should compare several written proposals, not just attractive monthly prices. Ask for expected annual production in kilowatt-hours. Request details about maintenance and replacement costs.

Small details matter. A chimney shadow may cross several panels by noon. Dust, snow, or nearby trees can quietly reduce output. No checklist removes every surprise. That is worth admitting. Solar technology is reliable, but planning mistakes still happen. A careful homeowner checks assumptions, reviews local requirements, and leaves room for changing energy habits. The best system is not always the largest one. It is the system that fits the roof, budget, climate, and household with measurable confidence.
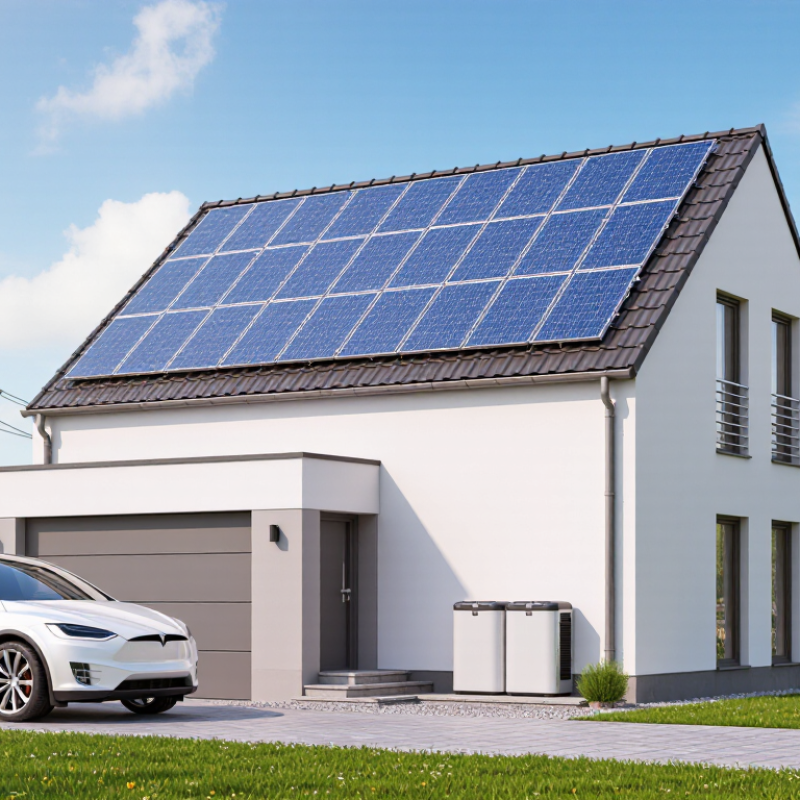
10 Tips to Install Solar Energy at Home?

Assess Your Home’s Solar Potential and Energy Needs

10 Tips to Install Solar Energy at Home?

Assess Your Home’s Solar Potential and Energy Needs

A useful solar assessment begins with your electricity bills, not rooftop space. Collect twelve months of bills and mark seasonal changes. Note air-conditioning, heating, water heating, and electric vehicle use. These loads can change your system size significantly. Write it down.

Walk around the roof at different times of day. Tall trees, chimneys, and nearby buildings may shade panels during peak sunlight. Take photographs at 9 a.m., noon, and 3 p.m. Roof direction and pitch also matter, although shading often matters more. Check the roof’s age, leaks, and structural condition before installation. Replacing an old roof later can require temporary panel removal.

Use local solar maps and sunlight data as starting points, not final answers. A qualified installer should inspect the roof, electrical panel, wiring, and grounding. Ask for production estimates by month, including cloudy-season output. Battery storage may help if evening demand is high or outages are common. However, storage adds cost, weight, maintenance, and design limitations. My first estimate once looked excellent until winter shade reduced expected production. That mistake taught me to question attractive projections. Compare expected annual generation with your actual usage, and leave room for future changes. A careful assessment may feel slower, but it prevents an expensive mismatch.

Choose the Right Solar System, Equipment, and Installer

Solar planning should start with evidence, not a glossy proposal.

Measure twelve months of electricity bills before sizing the system. Inspect roof age, structure, orientation, and shading at different hours. Use NREL’s PVWatts tool to compare estimated production with your actual consumption.

The IEA’s Renewables 2024 report recorded nearly 420 gigawatts of solar additions worldwide in 2023.

Rapid growth is encouraging, but a larger system is not automatically better. Ask for panel efficiency, temperature performance, degradation rates, and independent test documentation. Check inverter capacity carefully. A mismatch can reduce useful output.

Battery storage also needs honest analysis. Evening demand, outage needs, usable capacity, and replacement costs matter more than impressive specifications.

Choose an installer who provides licenses, insurance, references, and clear workmanship terms.

Request at least three itemized quotations. Compare equipment, labor, permits, grid connection, monitoring, and future service separately. Confirm the roof warranty before installation begins. Ask who handles inspections and utility approval.

IRENA reported global solar capacity reached about 1,419 gigawatts by the end of 2023, yet local installation quality still varies widely.

That distinction is easy to miss. Avoid pressure tactics and guaranteed savings. Savings depend on tariffs, weather, household behavior, and system downtime.

One practical correction: never accept a production estimate without its assumptions. Recheck shade losses and battery efficiency yourself.

The cheapest quote may become expensive after repairs, and the most expensive quote may include unnecessary capacity. Look for transparent calculations, realistic expectations, and a written maintenance plan.

Plan the Design, Budget, Permits, and Grid Connection

Planning solar at home starts with the roof, not the panels.

During a site assessment, measure usable roof area, pitch, orientation, and afternoon shade. A tall tree can reduce output more than expected. Check the main electrical panel too. Its capacity, wiring condition, and available breaker space affect the design. Ask a qualified electrician to verify these details. Do not guess.

Create a budget with separate lines for equipment, mounting, labor, permits, inspection, utility fees, and future maintenance.

Include battery storage only after reviewing evening consumption and outage needs. Compare expected annual production with your actual bills, using local sunlight data. My first estimate was too optimistic because I ignored winter shadows.

Build a contingency reserve. Prices and approval requirements can change.

Permit documents usually need a site plan, electrical diagram, structural information, and equipment specifications. Confirm the checklist with your local building authority before ordering materials.

Then contact the utility about interconnection rules, meter changes, export limits, and required inspections. Approval may take weeks. Keep every drawing and email.

A signed grid agreement is not the same as permission to switch on. Wait for final authorization. One overlooked form can delay the project, which is frustrating but preventable.

Install the Panels, Inverter, Battery, and Safety Components

10 Tips to Install Solar Energy at Home?

A safe solar installation begins with the roof, not the panels. Check roof age, leaks, load capacity, and shaded areas before ordering equipment. Measure your household’s daytime and nighttime electricity use. Oversizing the system can waste money. Undersizing it can cause frustration. Confirm permits and utility requirements with local authorities. Use a qualified electrician for grid connections and protection devices. Select a mounting system that matches the roof material and local wind conditions. Leave clear access around vents, edges, and drainage paths.

Install panels with secure rails, correct spacing, and weather-resistant cable entries. Label every cable before routing it. Place the inverter in a dry, ventilated area away from direct heat. Keep battery units away from bedrooms, standing water, and combustible storage. Follow the manufacturer’s temperature and clearance instructions. Add grounding, overcurrent protection, surge protection, and accessible disconnect switches. A battery also needs a suitable enclosure and emergency shutdown method. Do not hide cables behind sharp metal edges. Small details matter.

Test polarity, voltage, insulation, and shutdown functions before energizing the system. A licensed professional should inspect the final connections and record commissioning results. Monitor output during the first few weeks. One practical lesson is easy to miss: real roofs rarely behave like diagrams. Shadows change, cables shift, and assumptions fail. Keep updated drawings, maintenance notes, and equipment manuals for future repairs.

10 Tips to Install Solar Energy at Home? - Install the Panels, Inverter, Battery, and Safety Components

No. Installation Area Practical Data and Design Guidance Safety and Compliance
1 Assess Household Energy Use Review at least 12 months of electricity bills before sizing the system. Identify seasonal changes, high-load appliances, and the household's daytime energy demand. A typical home solar system may range from approximately 3 kW to 10 kW, depending on annual electricity consumption, available roof area, and local solar conditions. Use the utility meter data where available. A qualified designer should verify the final system size and grid-connection requirements.
2 Check Roof Condition and Orientation Inspect the roof structure, covering, drainage, shading, and remaining service life before installing mounting hardware. Keep panels away from persistent shadows where possible. In the Northern Hemisphere, south-facing surfaces generally receive strong annual solar exposure; east- and west-facing surfaces can also work with different production patterns. Roof pitch near the local latitude is often a useful starting point, but site conditions are more important. Do not install over damaged roofing. Maintain safe access paths and use fall-protection equipment during roof work.
3 Select the Solar Panels Choose panels with suitable dimensions, electrical ratings, temperature performance, and mechanical-load specifications. Confirm that the total panel area fits around vents, skylights, and roof edges. Many current residential panels have power ratings of roughly 350 W to 500 W each. A 6 kW array would require approximately 12 to 18 panels, depending on the selected panel rating. Use certified equipment and verify wind, snow, fire, and mounting requirements applicable to the installation location.
4 Design the Mounting System Use a mounting system designed for the specific roof type. Plan rail spacing, attachment points, cable routing, expansion allowance, and water-shedding details before drilling. Mounting hardware must be compatible with the roof material and panel frame. Array layout should allow access for inspection, cleaning, and future maintenance. Penetrations must be properly sealed. Structural attachment points should be verified against local wind and snow loads by a competent installer.
5 Install the Inverter Place the inverter in a dry, well-ventilated location protected from direct sunlight, flooding, excessive heat, and physical impact. Keep manufacturer-required clearances around the enclosure. The inverter's continuous AC rating should be matched to the intended system output. Oversizing the DC array relative to the inverter is sometimes allowed, but the permitted DC-to-AC ratio must follow the equipment documentation. Install DC and AC isolation devices where required. The inverter must be correctly grounded, protected, and connected by a qualified electrical professional.
6 Plan Battery Storage Add a battery when backup power, time-of-use savings, or increased self-consumption justifies the cost. Define which circuits require backup instead of automatically powering the entire home. A battery's usable energy is lower than its nameplate capacity because of reserve settings and operating limits. A household may begin with approximately 5 kWh to 15 kWh of usable storage, depending on critical-load demand. Install batteries in an approved location with suitable temperature control, ventilation or spacing, protection from water, and clear access for emergency response.
7 Size Cables and Protection Devices Calculate conductor size, voltage drop, short-circuit current, and interrupting capacity for every circuit. Use outdoor-rated wiring and secure cables away from sharp edges and standing water. DC voltage drop is commonly designed to remain low, often around 1% to 3% where practical. Final conductor sizes depend on current, cable length, ambient temperature, installation method, and local electrical rules. Use correctly rated fuses, circuit breakers, surge protection, and disconnects. Never disconnect energized DC connectors unless the equipment is specifically designed for that operation.
8 Provide Grounding and Surge Protection Bond exposed metal components and connect the system to the building's grounding and bonding network according to the applicable electrical code. Surge-protection devices may be required on DC and AC sides depending on system design, building characteristics, lightning exposure, and local regulations. Do not assume a rooftop solar array replaces a lightning-protection system. Grounding and bonding must be tested and documented after installation.
9 Complete Permits and Grid Connection Submit design documents, equipment specifications, structural information, and electrical diagrams before construction when required. Schedule inspection and utility approval before operating a grid-connected system. Common documents include a single-line diagram, array layout, equipment ratings, disconnect locations, protection settings, and structural attachment details. Never energize a grid-connected system before receiving required approval. Anti-islanding protection is essential so the system shuts down safely when the utility grid is unavailable.
10 Test, Monitor, and Maintain the System After installation, verify polarity, insulation resistance, grounding continuity, operating voltage, inverter status, battery settings, and emergency shutdown operation. Monitor production to identify faults early. Clean panels only when soiling materially reduces output. Inspect mounting hardware, cable insulation, connectors, roof seals, and battery condition periodically, especially after severe weather. Turn off the appropriate AC and DC isolation devices before maintenance. Solar panels can produce hazardous voltage in daylight, even when the grid supply is disconnected.

Important: Solar installation requirements vary by location, building type, utility rules, and electrical code. Final design, wiring, structural work, commissioning, and grid connection should be completed or inspected by appropriately qualified professionals.

Inspect, Monitor, Maintain, and Improve Your Solar System

10 Tips to Install Solar Energy at Home?

A home solar system works best when treated as equipment, not a “fit and forget” purchase. During monthly checks, photograph the inverter screen, meter, roof shading, cable routes, and mounting points. Compare daily output with the same season, not yesterday. Clouds and temperature distort quick judgments. The National Renewable Energy Laboratory found a median photovoltaic degradation rate near 0.5% per year (NREL, 2018). Gradual losses can hide in normal variation. Check for cracked glass, loose fasteners, corrosion, nesting, and water marks from ground level. Do not climb onto panels without proper fall protection. An electrician should inspect live circuits and protective devices.

Monitoring software helps, but it is not a diagnosis. Set alerts for sudden production drops, repeated inverter faults, abnormal nighttime consumption, and unexplained export changes. The IEA Photovoltaic Power Systems Programme reported global solar capacity exceeded two terawatts in 2024 (IEA PVPS, Trends in Photovoltaic Applications 2025). Clean panels only when dust meaningfully reduces yield. Abrasive tools and harsh water can cause damage. Trim new shade sources, improve equipment ventilation, and review battery settings after household-load changes. Keep invoices, inspection dates, fault codes, and weather notes in one log. I once blamed a small output dip on a panel failure. It was tree shade. That mistake still matters. Annual professional inspection is sensible, but maintenance should follow measured performance, local weather, and the installation manual.

FAQS

What information should I collect before sizing a home solar system?

Gather twelve months of electricity bills. Mark seasonal changes clearly. Note air-conditioning, heating, water heating, and electric vehicle use. Your roof area alone is not enough.

How can I check whether my roof receives enough sunlight?

Walk around the roof at 9 a.m., noon, and 3 p.m. Photograph shadows from trees, chimneys, and nearby buildings. Peak sunlight matters. Shade can reduce production more than roof direction.

What roof conditions should be checked before installation?

Check the roof’s age, leaks, structure, and mounting areas. An old roof may need replacement later. Removing panels temporarily can add cost and disruption. I once ignored roof age. That was not smart.

Are online sunlight maps enough for a final solar estimate?

No. Use them as starting points only. A qualified installer should inspect the roof, electrical panel, wiring, and grounding. Ask for monthly production estimates, including cloudy-season output.

When might battery storage be useful?

Batteries may help when evening electricity use is high. They can also support homes with frequent outages. However, batteries add cost, weight, maintenance, and design limits. More storage is not automatically better.

How should I monitor a solar system after installation?

Photograph the inverter screen and meter each month. Compare output with the same season, not only yesterday. Clouds and temperature affect short-term results. Keep a simple log.

What signs may indicate a solar system problem?

Watch for sudden output drops, repeated inverter faults, and unusual nighttime consumption. Check for cracked glass, loose fasteners, corrosion, nesting, and water marks. Monitoring software helps, but it cannot diagnose everything.

How should panels and surrounding equipment be maintained?

Clean panels only when dust clearly reduces production. Avoid abrasive tools and harsh water. Trim new shade sources and keep equipment ventilated. Do not climb onto panels without fall protection. Use an electrician for live circuits.

How much performance loss is normal over time?

Solar panels gradually lose output each year. A commonly reported average is about 0.5 percent annually. Small losses can hide within changing weather. Compare long-term seasonal data before assuming failure.

What records should I keep for future troubleshooting?

Store invoices, inspection dates, fault codes, weather notes, and production readings together. Record roof shading changes too. This creates useful evidence. My first explanation was wrong; tree shade caused the dip.

Conclusion

Installing solar energy at home requires careful planning, informed decisions, and ongoing attention. Before you Install Solar Energy, evaluate your roof’s sunlight exposure, available space, electricity usage, and future energy needs. Then select a suitable solar system, including panels, an inverter, optional battery storage, and essential safety equipment. Compare qualified installers based on experience, workmanship, warranties, and service quality rather than focusing only on price.

A successful project also depends on a clear design and realistic budget. Account for equipment, labor, permits, inspections, and possible grid connection requirements before construction begins. During installation, ensure that panels, wiring, inverters, batteries, and protective components are fitted according to approved standards. After the system is activated, review inspection results, monitor energy production, and check for unusual performance. Regular cleaning, maintenance, and future adjustments can help the system remain safe, efficient, and valuable for many years.


Henry

Henry

Henry is a dedicated marketing professional with a profound expertise in the company's offerings. With years of experience in the industry, he possesses an impressive understanding of the market dynamics and consumer behaviors that drive success. Henry is committed to sharing his insights through......